

This helmet in my mind is one of the most challenging pieces of the outfit, and thats saying something! Heres what I had to deal with.

I started by pulling the helmet shape from the in game model to get the basic shape. After ripping it apart I made a 2 piece template that would fold together into the shape of the whole helmet all at once. There was a lot of trial and error involved in this, but having a model helped immeasurably. In the end, I transferred my base pattern to 3mm PVC and cut each half out. They might be the craziest looking patterns ive ever used!


Using a heat gun, I slowly heated up and bent the plastic to the shape of the helmet, using the pattern to meet edges and generally fightin with it for awhile. After a very long time tweaking and gluing, this is what I had.


Complicated helmet base in a day! Obviously the tape couldnt stay forever, I glued it all together, then to make it a solid peice I mixed fiberglass resin, PVC dust (from my orbital) and bondo together to make a thick sludge, then slushed it around on the inside of the helmet. There is about a 2mm coat of the stuff holding it all together in there. After it dried, the helmet was rock solid and I could sand and fill it to kingdom come to get rid of those peaks and fold marks. This was a lot of boring sanding, but in the end I got a much cleaner helmet base that was quite strong. I had already designed the inner cheek pattern, and while it was drying cut out the basic shape of the inner cheaks and border, as I needed them for the next part of shaping this. After a lot of work, this is what I had.


Much cleaner shape! At this point it was time to fill all the gaps and sand it down once again. I hit the gaps with bondo, and used filler primer to suss out the flaws in the surface and after this was done it was time to start on the detailing! I started by adding the inner detailing to the cheeks using 1mm PVC.

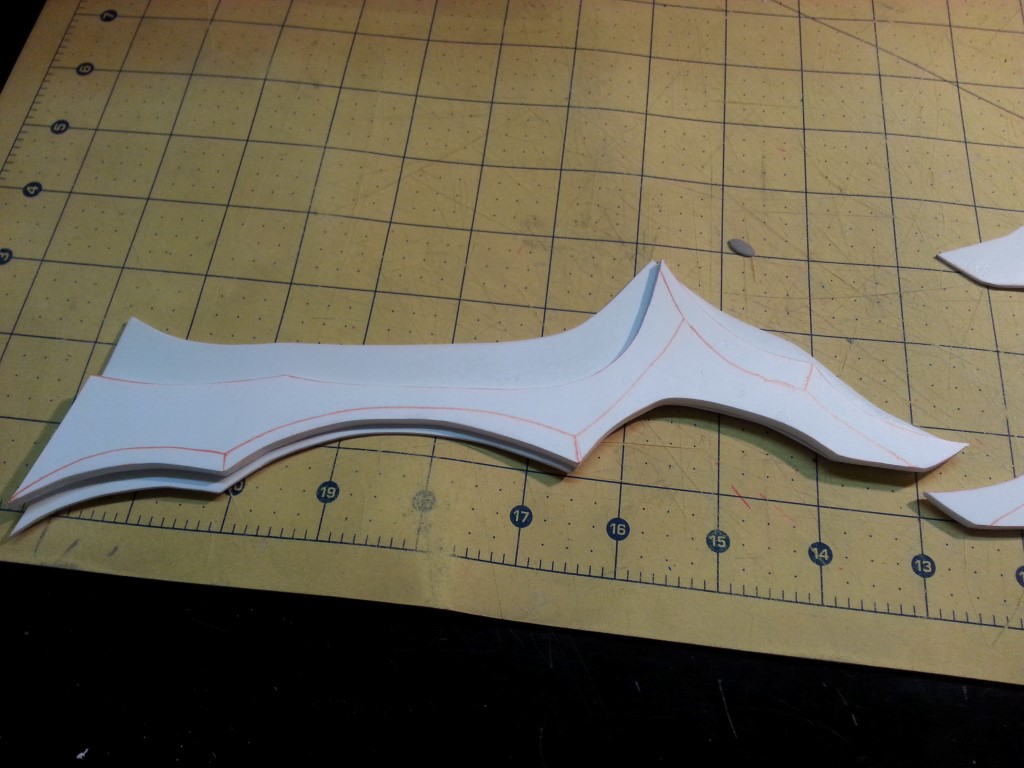
Then I added the big arrow crest on the top of the head using more 1mm and 3mm PVC. The beveled I sanded into the PVC using a dremel and orbital sander.

After this, I added the border to the cheeks using carefully cut 2mm PVC, I made the little raised detailing on the lower jaw by adding a sheet of 1mm and grinding down the front of the helm with a dremel until it had a sharpened edge.

At this point, it was cleanup time. I gave the whole thing a coat or two of primer and cleaned up the seems and detailing.


Now comes the stressful part – patterning and mounting the “crown” onto the helmet. Using the model, I came up with a pattern for both sections, and cut the innermost back horns out first. This part took.. me a long time to wrap my head around. In the end, I connected the back parts and screwed them in place. These parts were made with layered 1mm and 3mm sintra for detailing.


After these were on, I patterned out a basic shape for the front sections and temporarily attached them in place with screws to get an overall look before i dug into the detailing. Getting the pieces that fit and looked symmetrical was a lot of trial and error, and more stress then id like to admit. It was worth it when I put it with the rest of the armor for a size test though.

I was very happy with where it was going at this point. The cinematic Imperius has the smallest head in all existence, and I was afraid my helmet would have a sort of bobble head effect being bigger then it should be. In the end I was able to make it fit my head so tightly that the size worked, and no padding is even required.
Anyways, on to the crown detailing.
I started on the side section, cutting out the basic shape of what I could find, and drawing up a inner detailing layer in 3mm PVC. After this was drawn up, it was time to bust out the dremel.

After a LOT of sanding…

It was time to mount this and the rest of the crown to the helmet. I lined it up, glued it in place, and finished out the detail and gap filled using Apoxie Sculpt.

More primer, sanding, and filling.


At this point everything was set in place. the shape together! Time to MAKE IT GOLD. A final coat of filler primar and more sanding.. and then.. Hit it with the Krylon Brilliant gold!

Hot damn thats shiny. I went in with some black acrylic and toned down some of the gold, added a bit of weathering and scratches.. then clearcoated the whole thing! After a LONG time and LOT of effort, Imperius helmet was completed!


One crown of heaven, coming right up.
Incredible work.
hola , me has inspirado para hacer un imperius, pero no encuentro el archivo en pepakura (pdo) tu me podrías hacer el favor de conseguirlo o si lo tienes